Apitor Educational Robot
Chapter 3 Settings Screen
Chapter 3.1 Introduction
After clicking the cross in Fig. 2-6 in Chapter 2, you entered the Settings Screen. Or in other words – The visualization of the Bluetooth communication process has disappeared from the Settings Screen in Fig. 2-6.
You can also access Settings from the Home Screen using the Settings button –> see chapters 4, 5 and 6.
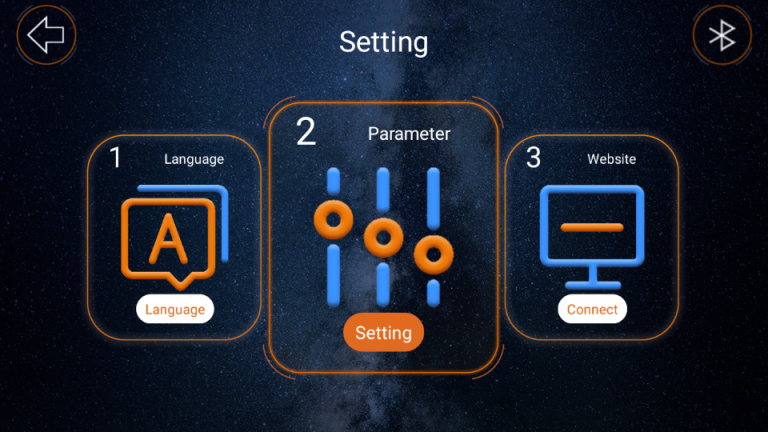
Fig. 3-1
Settings screen
Contains 3 buttons – inputs to 3 subscreens:
1. Language
2. Parameter
3. Website
Chapter 3.2 Language subscreen
The default language for example Polish, but set it again for practice.
Click anywhere on the 1. Language key. It should enlarge as below.
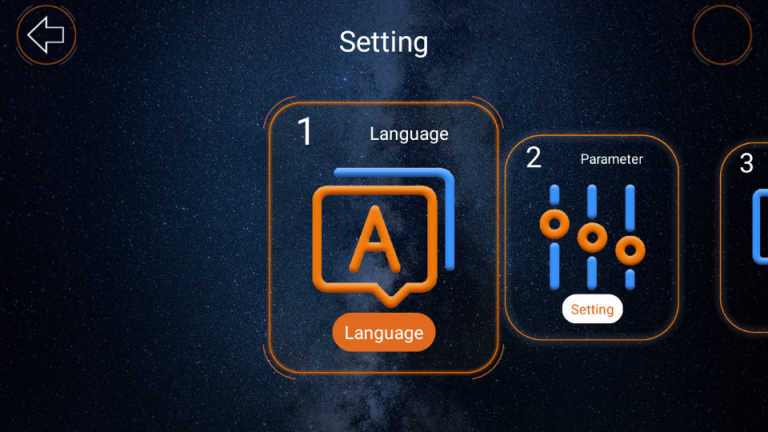
Fig. 3-2
Button 1. Language on click
Now click on the bottom Language button
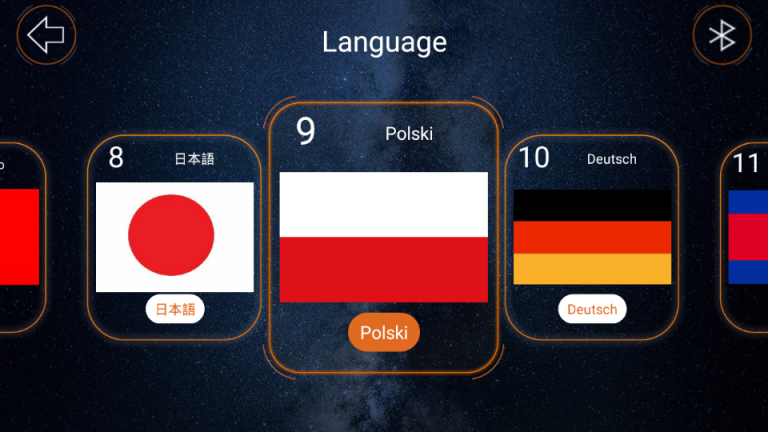
Fig. 3-3
Polish was the language chosen here.
If you want, for example, German, move the 10 Deutsch key to the left, click the lower Deutsch button and confirm in German by clicking “ja”.
Chapter 3.3 Parameter subscreen
Now let’s go to subwindow 2 Parameter of the Settings window.
1. Click the arrow in the upper left corner. The Settings subwindow will appear with the 1.Language key enlarged as shown in Fig. 3-2.
2. Now swipe right on the 2.Parameter key and click on the lower Settings.
You will see the window below.
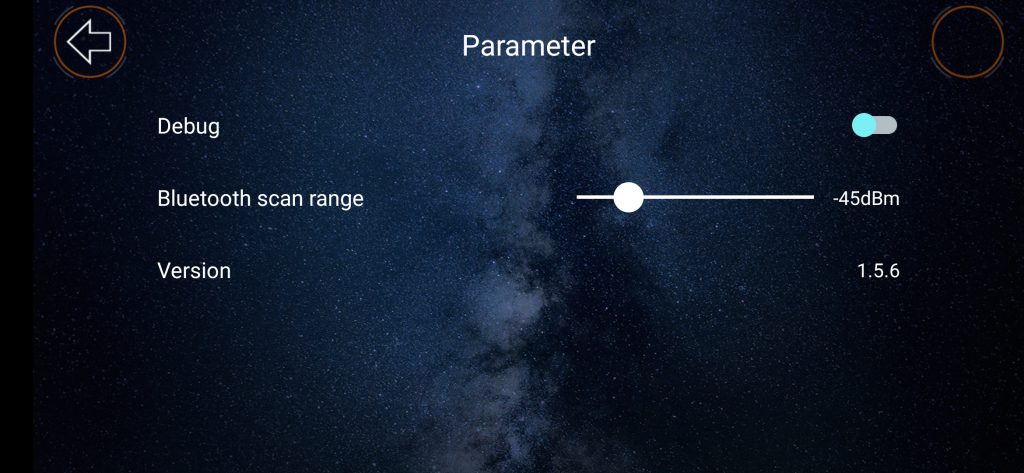
Fig. 3-4
Parameter window
If the range is too short, increase it by moving your finger. Debug–> We will not deal with this topic for now.
Click the arrow-Undo in the top left corner and set www.
Chapter 3.4 Web subscreen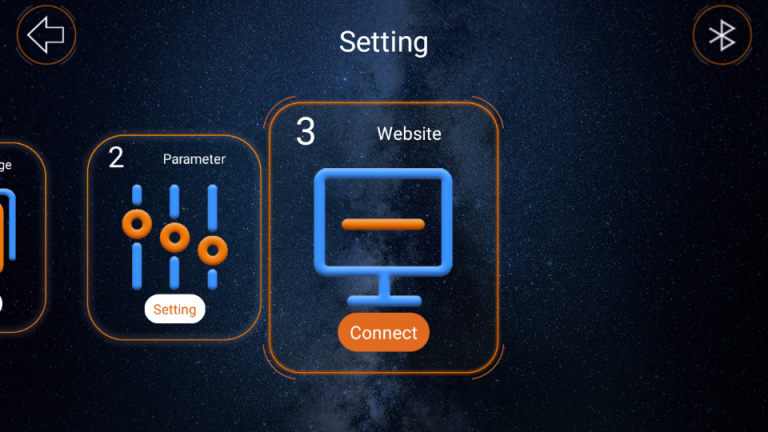
Rys. 3-5
Company www page
Click connect and go to company www page.
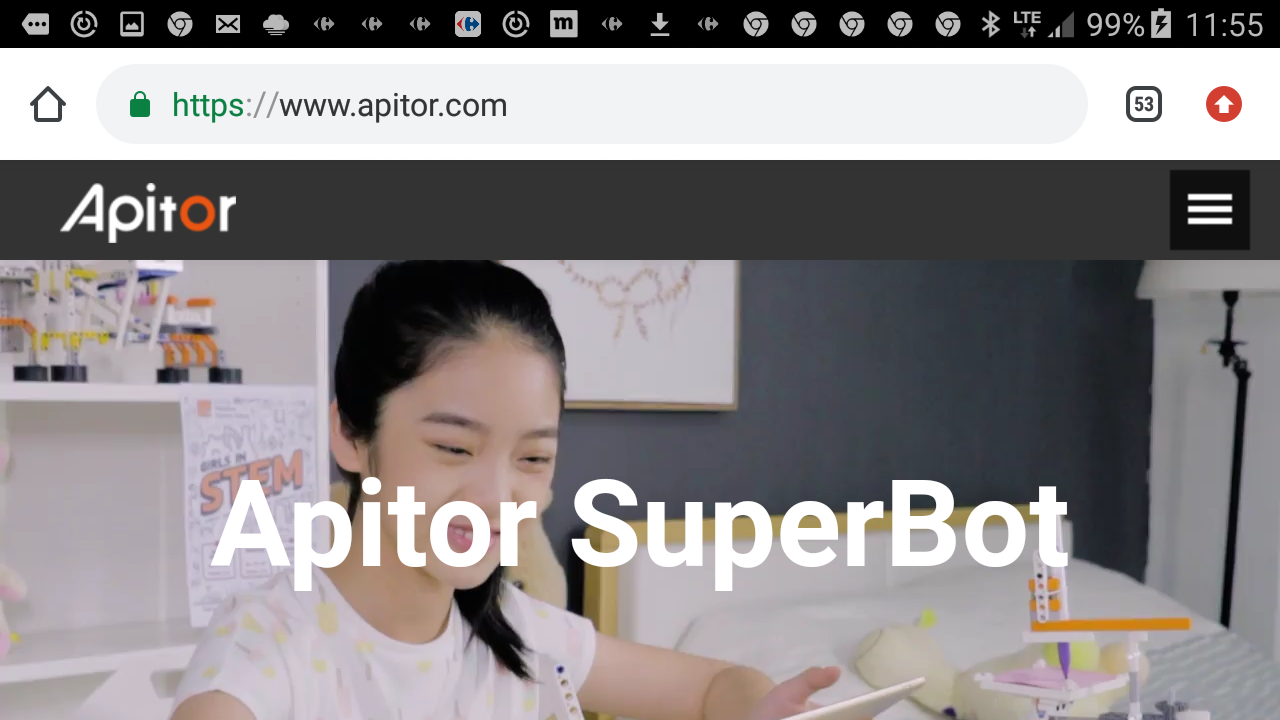
Fig. 3-6
You will see the manufacturer’s website with a video and a short description of the robot. Return to the application by clicking the return button on your mobile phone. The screen will appear–> Fig. 3-5.
Now let’s go to the Training screen.
Click the upper left arrow –> Fig. 3-5. You will enter the Home Screen below.
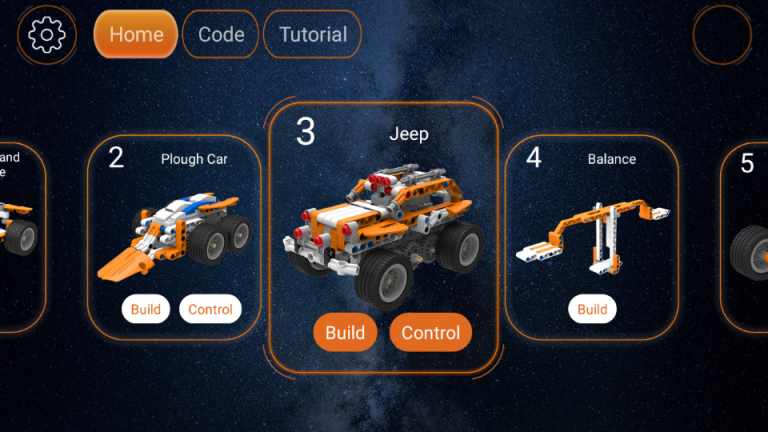
Fig. 3-7
Home screen
Go to the Tutorial screen by clicking its button. Further description in chapter 4 Tutorial screen.